 Buy Now →
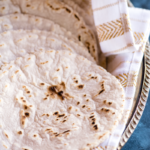
 Foolproof Grain Free Tortillas
Adapted to be grain free from this Serious Eats recipe.
- Prep Time: 10 mins
- Cook Time: 10 mins
- Total Time: 20 mins
- Yield: 6 6 inch tortillas 1x
Ingredients
Scale
- 1 cup / 165 g cassava flour
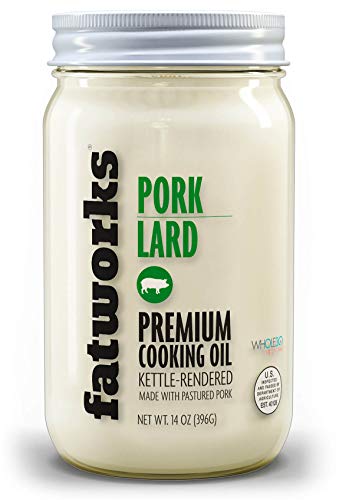
- 3 tbsp / 45 ml cold organic pork lard, palm shortening or avocado oil (I recommend lard)
- 1/4 – 1/2 tsp fine sea salt
- 1/2 cup + 2 tbsp / 150 ml cold water
Instructions
- COMBINE: Add the flour, fat and salt to the bowl of a food processor. I like to use the smaller amount of salt if using lard as the fat, and the larger amount when using avocado oil or palm shortening. A 4 cup sized mini food processor is large enough for this sized batch, even though it doesn’t look like it! Pulse – with your hand over the holes in the lid if using a mini food processor – until the flour mixture resembles very fine crumbles. Add the water to the bowl and process until everything combines into an even looking dough.
- DIVIDE: Scrape your mixture out of the bowl and onto a clean work surface (no need to add any extra flour) and use your hands to work it together into a smooth, pliable dough. Lard will make for a very slightly drier dough, but that’s ok. Divide your dough into six evenly sized portions — I recommend using a digital kitchen scale for this if you have one. Roll each into a ball and flatten the top into a disk.
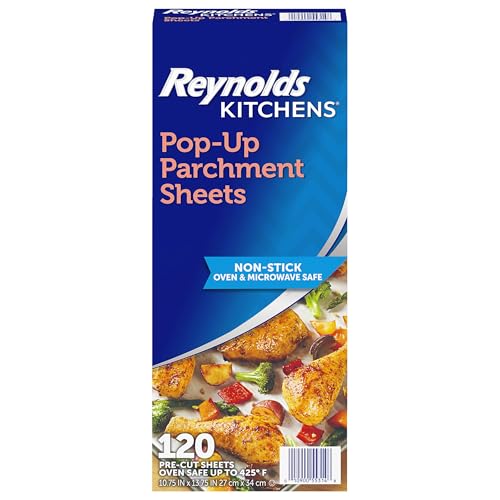
- PRESS: Preheat a dry 12 inch cast iron skillet over medium heat. Cut two pieces of parchment paper to fit the width of an 8″ tortilla press. Place the first piece of parchment on the bottom of the press, then put a disk of dough on top, slightly off center. Place the second piece of parchment on top, then press the dough into a six inch round tortilla (see notes). Peel off the top piece of parchment and set aside to reuse.
- COOK: Make sure your skillet is very hot by splashing a few drops of water in the bottom. If they sizzle, you’re good to go. Hold the tortilla, parchment paper side down in one hand then gently flip it over into your other hand. Carefully peel off the parchment paper (saving it to line the press again later) and add the tortilla to the hot skillet. You should hear it sizzle slightly. Cook until you start to see a few air bubbles forming in the dough at the edges and the dough starts to pull away slightly from the skillet at the edges, about 30 – 60 seconds. When there are some golden brown or even slightly charred spots on the bottom of the tortilla, you’ll know that it’s ready to flip over. Use a spatula to flip the tortilla and to cook the other side until it too has a few golden spots, anything from 10 – 30 seconds. Transfer the cooked tortilla to a plate covered in a clean cloth to allow the steam to dissipate and keep the underside of the tortillas crisp.
- REPEAT: Follow the “press” and “cook” steps above until all of the dough has been cooked and you have six tortillas in total. Note that the cooking times for each tortilla will vary slightly: the longer your skillet is on the heat, the less time each tortilla will take, so watch for doneness as described above rather than depending on an exact cooking time. Remember that the second side will not take as long as the first. Make sure to flip your tortillas and remove them from the heat as soon as they are done, as the longer you leave them on the heat, the less pliable they will become when cooled.
- MAKE AHEAD: If you want to press the tortillas all at once and then cook them, stack them with parchment paper beneath and between each one so that you can peel, drop and cook them easily. They’re too thin and fragile once pressed to hold their shape on their own and so will tend to stick to plates or surfaces and break when you attempt to pick them up. If you want to make the dough ahead of time, you can form it into balls and place it in a bowl covered with saran wrap in the fridge. I wouldn’t recommend doing this for more than 30 minutes to an hour or so, though, as the dough will eventually dry out.
- STORE: Keep the cooked tortillas in an airtight container or plastic bag. They will become much softer once they’ve been stored overnight and I recommend that you reheat them in a warm skillet rather than eating them cold once they’ve been kept that way, since they lose their texture. Reheated, they will be slightly more chewy and less crisp or flaky. Additionally, the flavor of the cassava flour will come through a little more strongly once reheated.


Notes
If you can, please consider using an inexpensive digital scale to measure your ingredients for this recipe. Volume measurements like tablespoons and cups can vary greatly, which is not ideal for any kind of bread or baking!
This recipe was tested solely with Otto’s Cassava Flour – results may differ across brands since they have different levels of moisture absorption.
When working with a lard based dough, the tortillas are more prone to crack at the edges. For a smooth, round tortilla shape, I find it best to press the dough more than once. First, I press the tortilla about half way into a three or four inch round. Then I use the curve of my fingers to press any rough, ragged edges into a smooth circle. Then I press the tortilla a second time to get a nice, evenly rounded shape with neat edges.
You may also find it helpful to rotate the tortilla around 180 degrees before pressing a second time to get a more even thickness on the tortilla. The tortilla press tends to put more pressure on the side nearest the hinge, which can make that side slightly thinner.
Find it online: https://meatified.com/foolproof-grain-free-tortillas-aip/