
The great thing about making your own homemade bone broth is that it’s both easy and economical.
Although you can go out and purchase soup bones from your grocery store or butcher, I almost always make my own with leftover bones from cuts that I’ve cooked for meals. I save everything from roast chicken carcasses to turkey necks and backs, pork chop bones to the bone-y aftermath of bbq ribs, and even the remnants of steaks or braising cuts like short ribs and shanks.
At the end of meals, I’ll save any bones, scraps and even roasting juices. I keep the bones in a bag in the freezer and any juices or rendered fat in an airtight container. When I have enough bones to make broth, I’ll whip up a batch, usually in my Instant Pot these days for speek and ease.
Saving the bones is probably self explanatory when making bone broth, but you might wonder why I save the other bits. Honestly, the first reason is because I have a hatred of food waste that I inherited from my grandma. But the other reason is that the meat juices help give broth an extra flavor boost and any extra fat is actually a good thing, since I like to make a big batch of broth and then refrigerate it for later. As the broth cools, the fat rises to the top and solidifies, making a nice airtight seal that helps prolong the shelf life of the homemade bone broth.
Once you’re ready to use the homemade bone broth, it’s easy to scoop off the fat. Depending on your own preferences, you can save it to cook with or simply discard it, but either way letting the broth cool and then removing the fat gives you a lovely, non greasy broth that’s perfect for sipping on.
A few tips for making homemade bone broth:
- Leftover bones from meals are ideal; save them in the freezer until you have enough to make broth.
- If buying soup bones, they benefit from roasting first – I’ve added instructions for this below!
- You can make broth with any blend of bones you like, including chicken, pork, beef or lamb.
- For a lighter flavor, chicken & pork work best, but beef, lamb and bison also make lovely broth.
- You can mix and match bones – no need to stick to one specific animal source per batch!
- If you want a broth that gels especially well, add bones with higher levels of collagen, such as chicken necks, wings & feet, or beef & lamb neck or tail bones. Only use as much water as you need to just cover the bones: any more water will dilute down the broth and give you a lighter (or no) gel. But all broth is good – it doesn’t have to gel to be nutritious!
- You can reuse most bones at least once, aside from smaller bones like those from chicken. Once they are soft and crumbly, you’ll need to start over with fresh bones. I typically make a batch with fresh bones, then reuse them in the next batch along with a few additional fresh bones. Once the broth is done, I discard any soft bones, then save the others in the freezer again for the next batch. You can read more about when and how to reuse your broth bones here.
What you will need to make homemade bone broth:
- An Instant Pot®, slow cooker or stock pot
- A large mixing bowl & colander that fit together
- Tongs and / or a large slotted spoon
- A fine mesh strainer
- A few layers of cheesecloth
- A gallon sized pitcher or similar
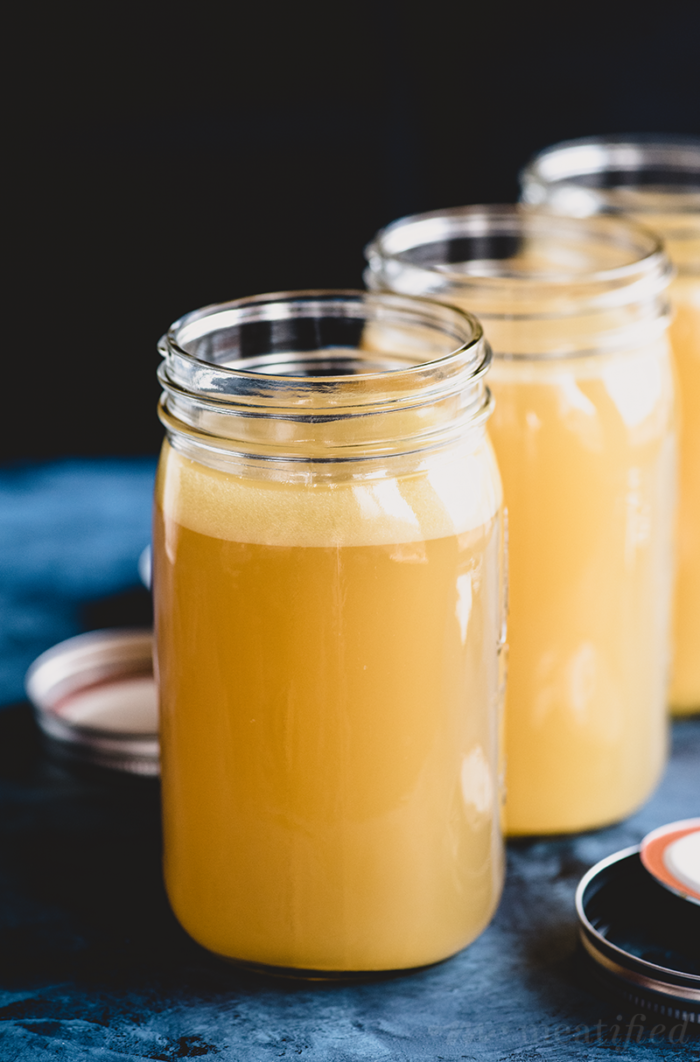
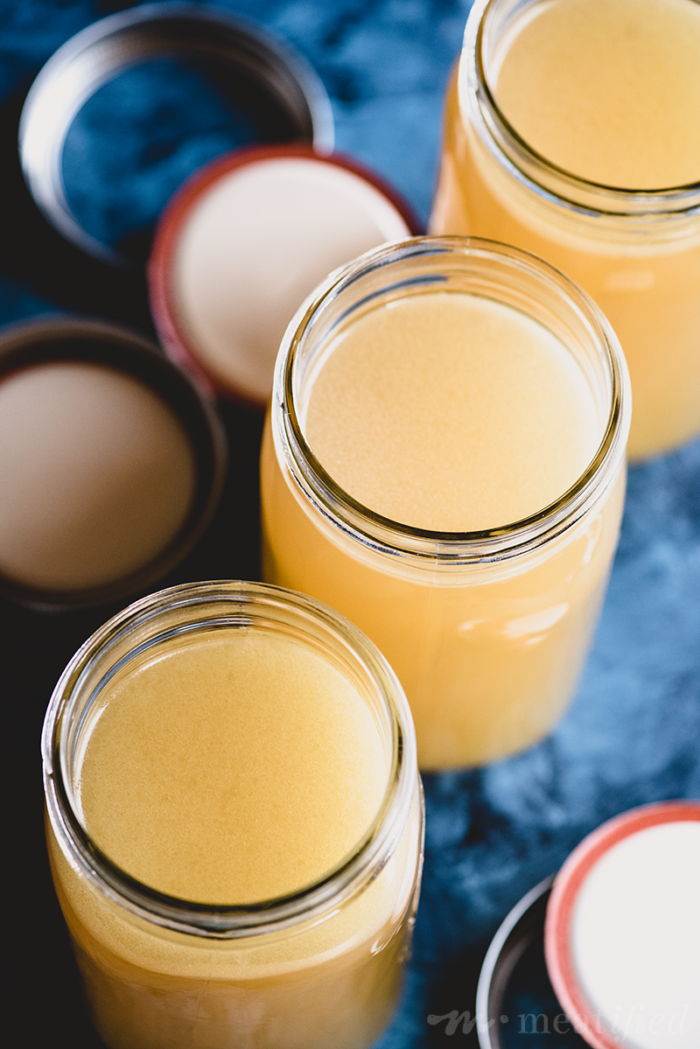
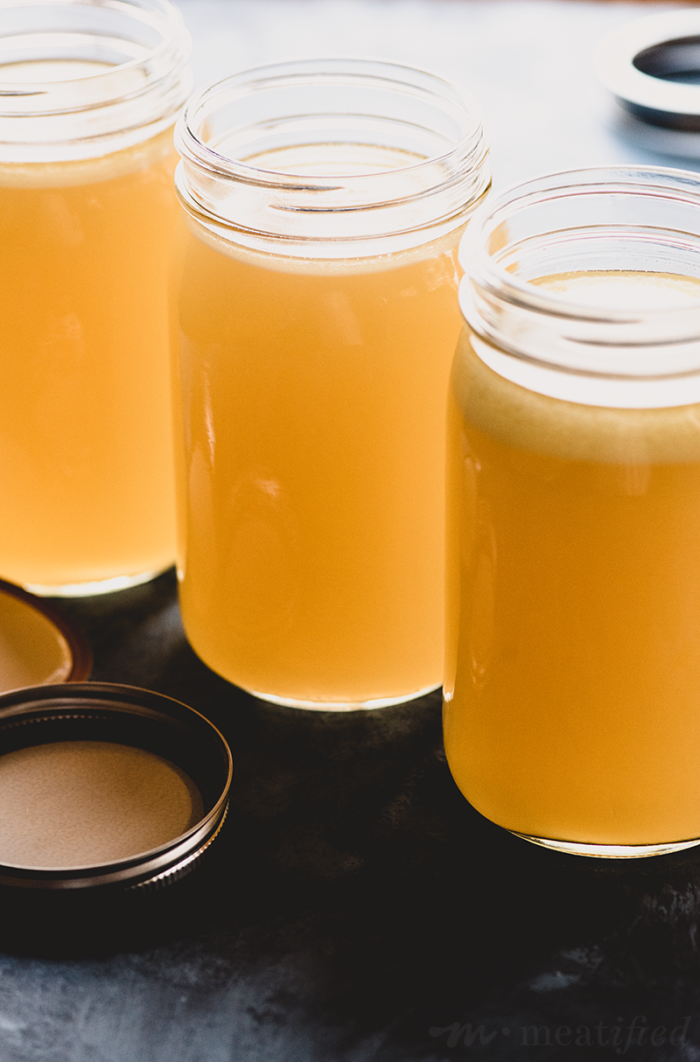
- Wide mouth Mason jars and lids (I like the quart size)
The methods are really very similar, but I’ve written up different instructions for making homemade bone broth whether you favor the Instant Pot, the slow cooker or a good old fashioned stock pot on the stove!
PrintHomemade Bone Broth: Instant Pot
- Prep Time: 10 mins
- Cook Time: 2 hours
- Total Time: 2 hours 10 mins
Ingredients
- Enough fresh or frozen bones to fill the Instant Pot 2/3 full
- 2 – 3 carrots
- 2 sticks of celery
- 1 medium onion
- 2 – 3 tbsp / 30 – 45 ml apple cider vinegar
- 1 – 2 bay leaves
- 2 – 3 sprigs rosemary
- Handful of fresh thyme
- 1 tbsp / 15 g fine sea salt or fine Himalayan salt, or to taste
- Enough water to just cover the bones
Instructions
- ROAST, optional: If you’re using larger beef, lamb or pork soup bones that haven’t already been cooked, you can add extra depth of flavor by roasting them first. Preheat the oven to 400°F (205°C). Lay the bones out on a lined baking tray (or two, depending on your bones) and roast for 1 hour. Let cool slightly.
- PREP: Place the bones into the Instant Pot until it is about 2/3 full. Chop the carrots and celery into about 3 pieces each, then peel and quarter the onion. Nestle the vegetable pieces in and around the bones, then pour over the apple cider vinegar and add the herbs. Add salt, to taste, and then pour just enough water into the insert to just cover the bones.
- COOK: Make sure that the bones and water are at least a little under the Max Fill line – do not overfill! After checking that the sealing ring and vent cover are in place correctly, close the lid and set the vent to the sealing position. Close the lid, set the vent to the “sealing” position and set the Instant Pot® to manual pressure (high) for 120 minutes.
- RELEASE: When the cook time is over, press the “Cancel” button. If you like, you can let the Instant Pot® release the pressure naturally, which will take about an hour. Alternatively, you can allow it to rest for at least 15 minutes, then use quick release.
- STRAIN: Using oven gloves, carefully transfer the Instant Pot® insert to a trivet. Place a colander inside a large mixing bowl. Use tongs or a slotted spoon to remove any large pieces of bone and vegetables to the colander – this helps avoid messy splashing in a minute! Pour the rest of the broth and bits carefully through the colander and into the mixing bowl, setting the cooking container onto the trivet again once it’s empty. Once the liquid has drained through the colander completely, place it inside the empty Instant Pot insert to cool.
- REPEAT: Place a fine mesh strainer on top of the gallon pitcher, then line that with a few layers of cheesecloth. Carefully strain the broth for a second time, pouring it from the bowl into the pitcher, through the strainer and cheesecloth to catch any remaining sediment or bone bits.
- STORE: Carefully divide the broth, pouring it into wide mouth Mason jars. Pop the lids on and transfer them to the fridge. Once they have cooled completely, you can transfer them to the freezer if you like, but make sure to leave plenty of head room for the broth to expand if you are going to freeze it in glass jars! If your broth has a good layer of fat on top, it will keep in the fridge for at least a week and often much longer. Frozen broth can be kept for at least 6 months.
- DISCARD: If you would like to save your bones to reuse, let them cool enough to handle first. Discard any herb stems, meat or pieces of fat. Go through the cooled bones, discarding any that are soft enough to crumble under a little pressure. Keep the remaining bones, transferring them to an airtight container and saving them in the freezer until you have enough bones to make a new batch of broth.
Homemade Bone Broth: Slow Cooker
- Prep Time: 10 mins
- Cook Time: 12 hours
- Total Time: 12 hours 10 mins
Ingredients
- Enough fresh or frozen bones to fill the slow cooker 2/3 full
- 2 – 3 carrots
- 2 sticks of celery
- 1 medium onion
- 2 – 3 tbsp / 30 – 45 ml apple cider vinegar
- 1 – 2 bay leaves
- 2 – 3 sprigs rosemary
- Handful of fresh thyme
- 1 tbsp / 15 g fine sea salt or fine Himalayan salt, or to taste
- Enough water to just cover the bones
Instructions
- ROAST, optional: If you’re using larger beef, lamb or pork soup bones that haven’t already been cooked, you can add extra depth of flavor by roasting them first. Preheat the oven to 400°F (205°C). Lay the bones out on a lined baking tray (or two, depending on your bones) and roast for 1 hour. Let cool slightly.
- PREP: Place the bones into the slow cooker until it is about 2/3 full. Chop the carrots and celery into about 3 pieces each, then peel and quarter the onion. Nestle the vegetable pieces in and around the bones, then pour over the apple cider vinegar and add the herbs. Add salt, to taste, and then pour over enough water to cover the bones. Make sure to leave about an inch clear at the top between the water level and the lid.
- COOK: Pop the lid on top and make sure it’s on securely. Set the slow cooker to LOW and cook for 12 – 24 hours (or even longer if you prefer). If your slow cooker has a vent or hole to allow for a meat probe, make sure to keep an eye on the water level in the slow cooker after the first few hours. If needed, add a little extra water throughout cooking to top off the water level and keep the bones covered. (I’ve never found this necessary myself).
- STRAIN: Using oven gloves, carefully transfer the slow cooker insert to a trivet. Place a colander inside a large mixing bowl. Use tongs or a slotted spoon to remove any large pieces of bone and vegetables to the colander – this helps avoid messy splashing in a minute! Pour the rest of the broth and bits carefully through the colander and into the mixing bowl, setting the cooking container onto the trivet again once it’s empty. Once the liquid has drained through the colander completely, place it inside the empty Instant Pot insert to cool.
- REPEAT: Place a fine mesh strainer on top of the gallon pitcher, then line that with a few layers of cheesecloth. Carefully strain the broth for a second time, pouring it from the bowl into the pitcher, through the strainer and cheesecloth to catch any remaining sediment or bone bits.
- STORE: Carefully divide the broth, pouring it into wide mouth Mason jars. Pop the lids on and transfer them to the fridge. Once they have cooled completely, you can transfer them to the freezer if you like, but make sure to leave plenty of head room for the broth to expand if you are going to freeze it in glass jars! If your broth has a good layer of fat on top, it will keep in the fridge for at least a week and often much longer. Frozen broth can be kept for at least 6 months.
- DISCARD: If you would like to save your bones to reuse, let them cool enough to handle first. Discard any herb stems, meat or pieces of fat. Go through the cooled bones, discarding any that are soft enough to crumble under a little pressure. Keep the remaining bones, transferring them to an airtight container and saving them in the freezer until you have enough bones to make a new batch of broth.
Homemade Bone Broth: Stovetop

- Prep Time: 10 mins
- Cook Time: 12 hours
- Total Time: 12 hours 10 mins
Ingredients
- Enough fresh or frozen bones to fill the stock pot 2/3 full
- 2 – 3 carrots
- 2 sticks of celery
- 1 medium onion
- 2 – 3 tbsp / 30 – 45 ml apple cider vinegar
- 1 – 2 bay leaves
- 2 – 3 sprigs rosemary
- Handful of fresh thyme
- 1 tbsp / 15 g fine sea salt or fine Himalayan salt, or to taste
- Enough water to just cover the bones
Instructions
- ROAST, optional: If you’re using larger beef, lamb or pork soup bones that haven’t already been cooked, you can add extra depth of flavor by roasting them first. Preheat the oven to 400°F (205°C). Lay the bones out on a lined baking tray (or two, depending on your bones) and roast for 1 hour. Let cool slightly.
- PREP: Place the bones into the stock pot until it is about 2/3 full. Chop the carrots and celery into about 3 pieces each, then peel and quarter the onion. Nestle the vegetable pieces in and around the bones, then pour over the apple cider vinegar and add the herbs. Add salt, to taste, and then add enough water to cover the bones by an inch or so, while still leaving plenty of room to avoid any spills.
- COOK: Bring the water to a good rolling simmer over medium high heat on the stovetop, then turn the heat down to low and cover the pot with a lid. Cook on low for 12 – 24 hours (or longer if you like). If there is any foam or impurities on the top of your broth, skim it off as it rises. Top off with additional water as needed, to make sure that the bones are always covered with water while cooking and the pot doesn’t reduce or boil dry.
- STRAIN: Using oven gloves, carefully transfer the stock pot to a trivet. Place a colander inside a large mixing bowl. Use tongs or a slotted spoon to remove any large pieces of bone and vegetables to the colander – this helps avoid messy splashing in a minute! Pour the rest of the broth and bits carefully through the colander and into the mixing bowl, setting the cooking container onto the trivet again once it’s empty. Once the liquid has drained through the colander completely, place it inside the empty Instant Pot insert to cool.
- REPEAT: Place a fine mesh strainer on top of the gallon pitcher, then line that with a few layers of cheesecloth. Carefully strain the broth for a second time, pouring it from the bowl into the pitcher, through the strainer and cheesecloth to catch any remaining sediment or bone bits.
- STORE: Carefully divide the broth, pouring it into wide mouth Mason jars. Pop the lids on and transfer them to the fridge. Once they have cooled completely, you can transfer them to the freezer if you like, but make sure to leave plenty of head room for the broth to expand if you are going to freeze it in glass jars! If your broth has a good layer of fat on top, it will keep in the fridge for at least a week and often much longer. Frozen broth can be kept for at least 6 months.
- DISCARD: If you would like to save your bones to reuse, let them cool enough to handle first. Discard any herb stems, meat or pieces of fat. Go through the cooled bones, discarding any that are soft enough to crumble under a little pressure. Keep the remaining bones, transferring them to an airtight container and saving them in the freezer until you have enough bones to make a new batch of broth.


LOVE THIS RECIPE! THE ROASTING MAKES SUCH A FLAVOR DIFFERENCE!!! QUESTION: DO YOU FREEZE THE BROTH IN THE MASON JARS? i USED TO COOL THE BROTH IN THE JARS IN THE FRIDGE AND THEN WHEN THEY ARE THOROUGHLY COOLED, PUT ON THE LID AND PUT INTO THE FREEZER. BUT… I HAD MANY OF THE JARS CRACKED AND BROKE. HOW DO YOU FREEZE THE BROTH OR DO YOU JUST REFRIGERATE IT?
I usually refrigerate mine because I use it up before it would go bad. If you do freeze them in jars, you need to make sure to leave a lot of head room at the top for the broth to expand as it freezes, that will help avoid any breakages in the future!